Friday 30 April 2010

Animating

Once I was satisfied with the skinning I had to start on the eagles animation. I animated the wings by moving them to an approproiate position and set a key frame for each one. Once I was happy with the motion I added more scenes in the timeline by holding down the shift button I copied what I had orginally made and moved them along.


As you can see in the timeline below I have copied the keyframes.


Thursday 29 April 2010

Skinning the eagle

After applying the biped to the eagle the next stage was skinning the eagle. I done this by adding a skin in modifier pannel. Under the parameters category I turned on edit envelopes and turned on vertices, this allowed to me to select the vertices in the eagle. I started by skinning the right wing first so I had to had the bipeds arm. I set simple key frames to see how the eagle flapped its wing to see how it moved and if it pinched in any parts. The wing did not flap with out some distortion to its body so I had to select certain vertices and applied a weight. In order for the vertices to be taken into affect I had to bake them. I had to complete this until the arm flapped smoothly. The skinning proved quite tricky and was very time consuming as I wanted it to look realistic when animated.

I then had to apply the same to the right wing. I am pleased with the overall look of the skinning however I think the left wing looks better than the right one and this is apparent when the wings beat together.

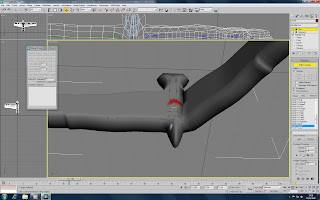
I decided to to add a beak and some eyes to the eagle to make it look more realistic. I done this by appling a sphere and cloning into and for the beak I used a cone. I also applied a material to the eagle so the tail is so it matches the one of the arrow and the body is brown.


Wednesday 28 April 2010

Creating a Scene

I decided that the scene would consist of a blue cloudy skyline and trees and greeny on the ground. To begin I researched tutorials on http://www.youtube.com/ to help come up with some ideas as I feel that modeling is not my strong point.

To begin I had to create a plane and in the modifers list turn on the noise, I then raised up the strength and added more segments to the plane so the the ground was not completely flat. I then applied a grass material to the plane and changed the tilling by 2.5 which made it visually more appealing. To create a sky I drew a sphere over the entire plane. Using the hempisphere button I cut the sphere in half. In the modifier list i chose normal, which allowed me to view the sphere on the inside. I then applies a UVW MAP and seleceted spherical. I then changed the amount of segements to 60 to give it a rounder shape. In the material library I chose a gradiance of three different shades of blue and applied it to the sphere. I was happy witht this sphere but found it confusing when I wanted to place the foliage inside because I had to make sure I was inside the sphere.


Looking at other peoples scenes I had noticed that instead of using a sphere they had used a plane and as a backdrop. I decided to keep the plane on the floor and place a plane on the back. I applied a material to the backdrop, this time I used an image of the sky from the internet. I lastly applied some foliage to the scene to make it more realistic.


Tuesday 27 April 2010

Modelling the Arrow

The final object I had to model was an arrow. I used basic shapes such as a sphere for the point, a cylinder for the long body and planes that I attached to the side. By scaling and resizing the parts I was able to play around with the until I was happy. I then grouped the three objects so they did not move when I moved the arrow.I then applied material to the object to make it appear more realistic. I used three different materials, wood grain for the body, metal for the sphere and feather on the end planes. The arrow is now ready to be merged into the scene with the eagle and animated.

I am pleased with the overall look of the arrow and think it looks very ralistic.


Monday 26 April 2010

Applying the Biped

After modelling the eagle I then placed a biped into model and had to start skinning. The biped was simple to place into the eagle and I only had to adjust a few limbs such as pull out the arms as they were to act as the wings so make them flap. I also pulled the head up so the eagle could move but I was unsure if i was going to animate this part yet.


The image shows the arms strecthed out and the last thing I had to do was adjust the head to fit into the eagles.